

개요
저번 시간에 Cache-Aside 와 Read Through를 통해 조회할 때 Redis에 캐싱된 정보를 한 번 찾고 Redis에 없으면 DB에서 가져오는 것을 배웠습니다.
Cache에서 가장 중요한 것은 데이터가 변경(등록, 수정, 삭제) 될 때 그 내용을 반영하여 항상 최신화를 유지하는 것 입니다.
Write Through 전략은 이 최신화를 유지하기 위한 전략으로 데이터를 Cache와 DB에 동시에 저장하는 방식입니다.
이는 캐시와 DB 간에 데이터 불일치가 발생해서는 안되는 상황에서 사용됩니다.
장점 / 단점
Write Through의 주요 장점은 Cache와 DB 사이에 데이터 불일치가 크게 줄어드는 것 입니다.
단점으로는 데이터를 두 군대에 기록하므로 쓰기 작업 성능이 느려질 수 있는 것 입니다.
구현
등록, 변경, 삭제에 Cache 관련 메소드를 넣어 Write Through 전략을 구현해보겠습니다.
이번에는 RedisTemplate을 이용해 구현했습니다.
왜냐하면 Cache에 저장하는 것은 Entity로 하는 것이 유리한 점이 많습니다.
DTO는 프론트 요구에 따라 자주 변경될 수 있습니다.
또한 하나의 엔티티에서는 여러 개의 DTO가 생성될 수 있습니다.
또한 저의 메소드는 service단에서 DTO로 변환한 후 Controller에 Return 합니다.
물론 메소드를 하나 더 추가해 Entitiy를 return 하는 메소드를 만들고 그것을 다시 dto로 변환해도 됩니다.
하지만, 저는 메소드 하나에서 처리하고 싶었기 때문에 @Cacheable 보단 RedisTemplate으로 Redis와 연결했습니다.
1. build.gradle에 의존성 추가
// redis
implementation 'org.springframework.boot:spring-boot-starter-data-redis'

// 직렬화, 역직렬화
implementation 'com.fasterxml.jackson.datatype:jackson-datatype-jsr310'
2. application.yml에 redis 연결 정보 추가
spring:
	redis:
	    host: localhost
	    port: 6379
	    password: ssafy
3. RedisConfig 파일 생성
package com.dotd.product.redis.config;


import com.dotd.product.entity.Product;
import com.fasterxml.jackson.databind.ObjectMapper;
import com.fasterxml.jackson.databind.SerializationFeature;
import com.fasterxml.jackson.datatype.jsr310.JavaTimeModule;
import lombok.RequiredArgsConstructor;
import org.springframework.context.annotation.Bean;
import org.springframework.context.annotation.Configuration;
import org.springframework.data.redis.connection.RedisConnectionFactory;
import org.springframework.data.redis.core.RedisTemplate;
import org.springframework.data.redis.serializer.Jackson2JsonRedisSerializer;
import org.springframework.data.redis.serializer.StringRedisSerializer;

@Configuration
@RequiredArgsConstructor
public class RedisConfig {

    private final RedisConnectionFactory redisConnectionFactory;

    // product 객체를 Redis에 연결하기 위해 RedisTemplate
    @Bean
    public RedisTemplate<String, Product> productRedisTemplate() {
        RedisTemplate<String, Product> redisTemplate = new RedisTemplate<>();
        redisTemplate.setConnectionFactory(redisConnectionFactory);

        // JSON 직렬화 설정
        Jackson2JsonRedisSerializer<Product> serializer = new Jackson2JsonRedisSerializer<>(Product.class);


        ObjectMapper mapper = new ObjectMapper();
        // Java 객체를 JSON 직렬화할 때 클래스 타입 정보를 포함시키도록 지시 -> 역직렬화시 올바른 타입 객체 생성
        mapper.enableDefaultTyping(ObjectMapper.DefaultTyping.NON_FINAL);
        // Java 8 날짜/시간 타입 지원 모듈 추가
        mapper.registerModule(new JavaTimeModule());
        mapper.configure(SerializationFeature.WRITE_DATES_AS_TIMESTAMPS, false);
        serializer.setObjectMapper(mapper);

        redisTemplate.setValueSerializer(serializer);
        redisTemplate.setKeySerializer(new StringRedisSerializer());

        return redisTemplate;
    }
}
4. service에서 메소드 생성
package com.dotd.product.service.product;


import com.dotd.product.dto.ProductRegistDto;
import com.dotd.product.dto.ProductResponseDto;
import com.dotd.product.dto.ProductUpdateDto;
import com.dotd.product.entity.Product;
import com.dotd.product.mapper.ProductMapper;
import com.dotd.product.repository.ProductRepository;
import lombok.RequiredArgsConstructor;
import lombok.extern.slf4j.Slf4j;
import org.springframework.cache.annotation.Cacheable;
import org.springframework.data.redis.core.RedisTemplate;
import org.springframework.stereotype.Service;

import javax.transaction.Transactional;
import java.util.Optional;

@Service
@Transactional
@RequiredArgsConstructor
@Slf4j
public class ProductServiceImpl implements ProductService{

    private final ProductRepository productRepository;
    private final ProductMapper productMapper;

    private final RedisTemplate<String, Product> redisTemplate;


    // 상품 상세 조회 Cache Aside 사용
    @Override
    public ProductResponseDto findByIdCacheAside(Integer id) {

        // 캐시 확인
        Product productRedis = redisTemplate.opsForValue().get("product" + id);
        if(productRedis != null) {
            return productMapper.productToProductResponseDto(productRedis);
        }
        else {
            Product productMySQL = productRepository.findById(id).get();

            // redis 에 캐싱
            redisTemplate.opsForValue().set("product" + productMySQL.getId(), productMySQL);

            return productMapper.productToProductResponseDto(productMySQL);
        }
    }


    // 상품 등록 wrtie-through
    public ProductResponseDto registProductWriteThroguh(ProductRegistDto dto) {
        Product product = productMapper.productRegistDtoToProduct(dto);

        // MySQL에 저장
        Product save = productRepository.save(product);

        // Redis에 저장
        redisTemplate.opsForValue().set("product" + save.getId(), save);

        ProductResponseDto result = productMapper.productToProductResponseDto(save);
        return result;
    }

    // 상품 변경 write-through
    public ProductResponseDto updateProductWriteThrough(ProductUpdateDto dto) {

        // MySQL Product 조회
        Product product = productRepository.findById(dto.getId()).orElseThrow(
                ()-> new RuntimeException("Product 조회 실패")
        );

        // Product 수정
        product.setName(dto.getName());
        product.setDescription(dto.getDescription());
        product.setPrice(dto.getPrice());

        Product save = productRepository.save(product);

        // 캐시 수정
        redisTemplate.opsForValue().set("product" + product.getId(), save);

        ProductResponseDto result = productMapper.productToProductResponseDto(product);

        return result;
    }


    // 상품 삭제 write-through
    public void deleteProductWriteThrough(Integer id) {

        // MySQL에서 Product 삭제
        productRepository.deleteById(id);

        // Redis에서 Product 삭제
        redisTemplate.delete("product" + id);
    }
}
5. controller 생성
package com.dotd.product.controller;


import com.dotd.product.dto.ProductRegistDto;
import com.dotd.product.dto.ProductResponseDto;
import com.dotd.product.dto.ProductUpdateDto;
import com.dotd.product.entity.Product;
import com.dotd.product.service.product.ProductService;
import lombok.RequiredArgsConstructor;
import lombok.extern.slf4j.Slf4j;
import org.springframework.http.ResponseEntity;
import org.springframework.stereotype.Controller;
import org.springframework.web.bind.annotation.*;

@Controller
@RequiredArgsConstructor
@RequestMapping("/product")
@Slf4j
public class ProductController {

    private final ProductService productService;


    // 상품 상세 조회 Cache Aside 사용
    @GetMapping("/findByIdCacheAside")
    public ResponseEntity<?> findByIdCacheAside(@RequestParam(name = "id") Integer id) {
        ProductResponseDto result = productService.findByIdCacheAside(id);
        return ResponseEntity.ok(result);
    }


    // 상품 등록 Write-Through
    @PostMapping("/registProductWriteThroguh")
    public ResponseEntity<?> registProductWriteThroguh(@RequestBody ProductRegistDto dto) {
        ProductResponseDto result = productService.registProductWriteThroguh(dto);
        return ResponseEntity.ok(result);
    }


    // 상품 변경 Write-Through
    @PatchMapping("/updateProductWriteThrough")
    public ResponseEntity<?> updateProductWriteThrough(@RequestBody ProductUpdateDto dto) {
        ProductResponseDto result = productService.updateProductWriteThrough(dto);
        return ResponseEntity.ok(result);
    }

    // 상품 삭제 write-through
    @DeleteMapping("/deleteProductWriteThrough/{id}")
    public ResponseEntity<?> deleteProductWriteThrough(@PathVariable Integer id) {
        productService.deleteProductWriteThrough(id);
        return ResponseEntity.ok("ok");
    }
}
6. 실행 결과
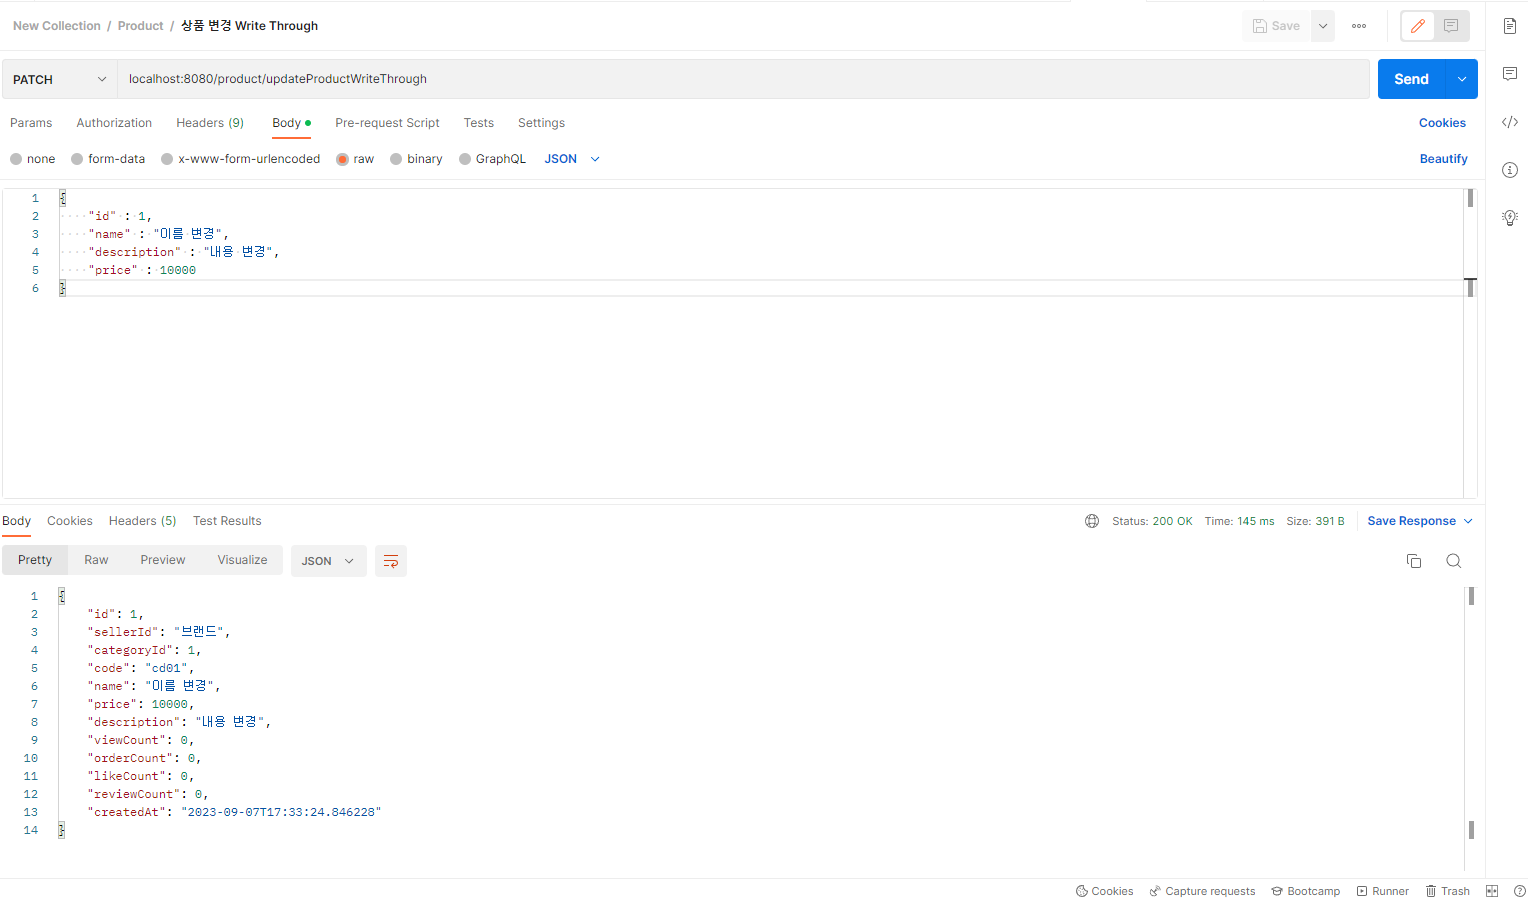
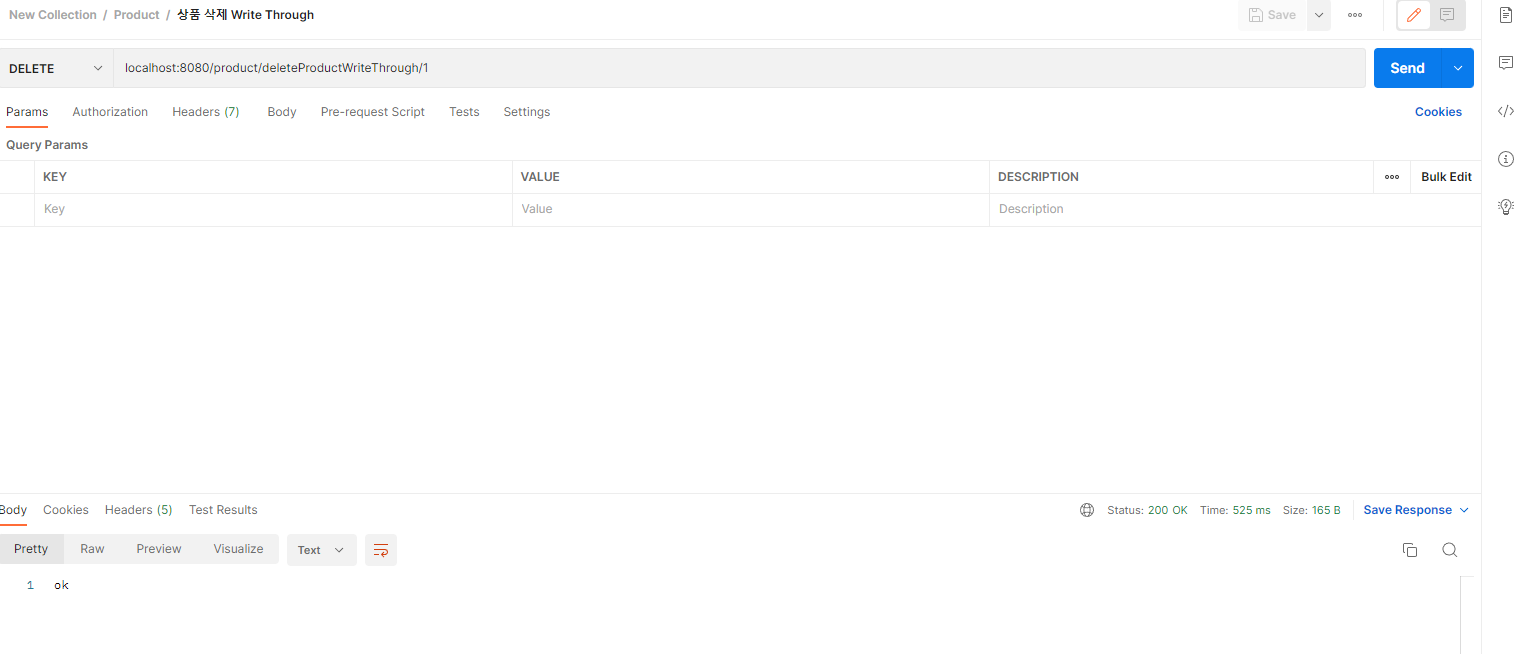
저는 Postman으로 요청을 보냈습니다.
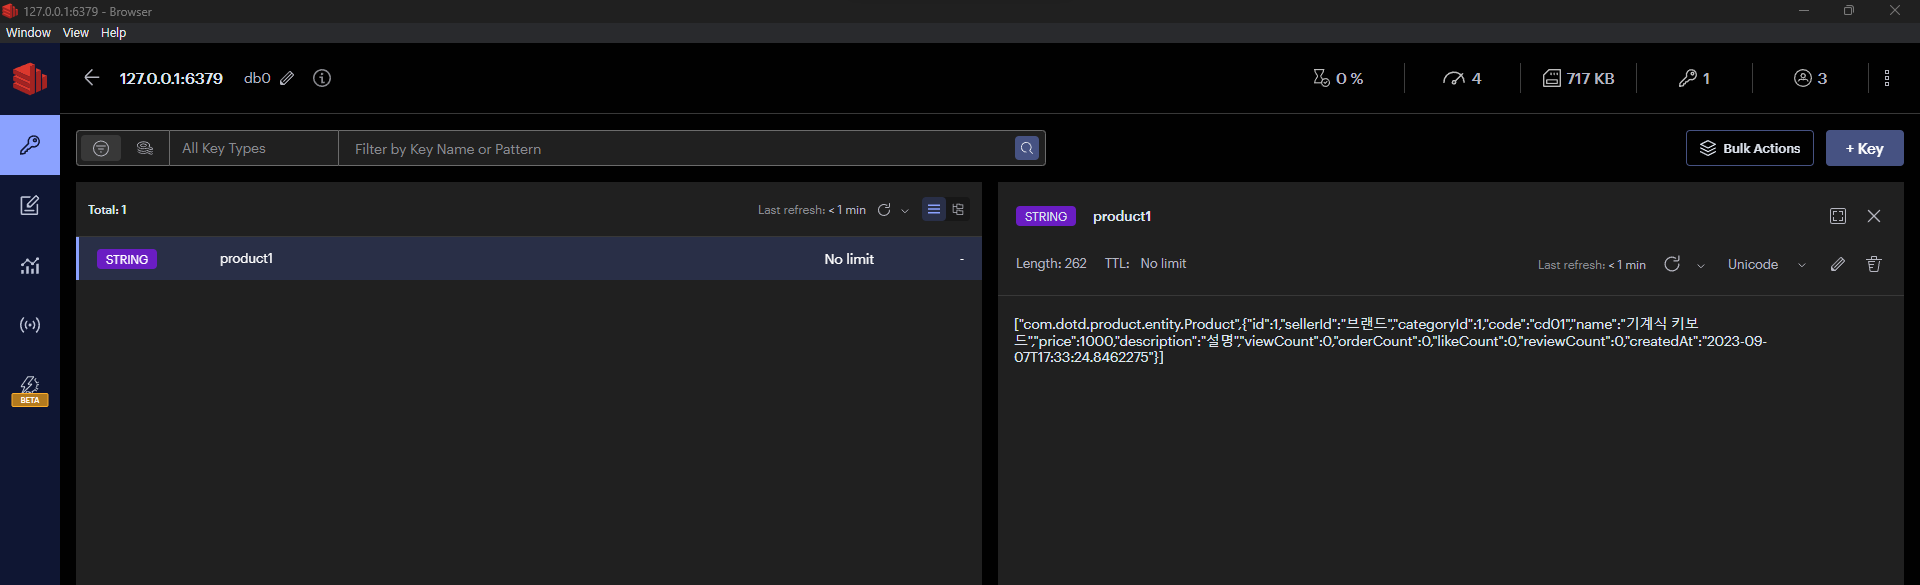
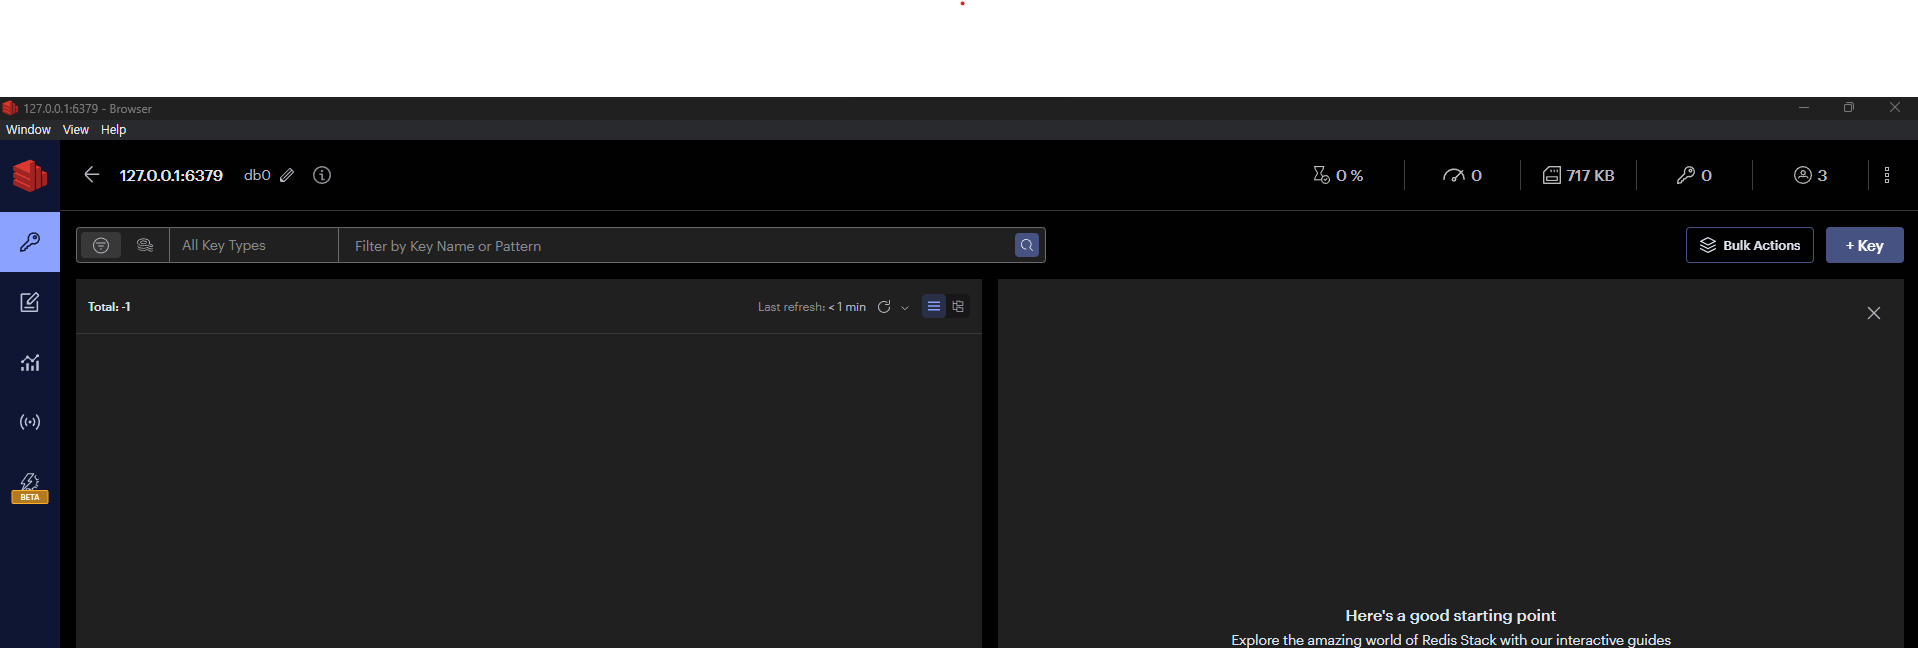
RedisInsight 프로그램을 통해 Redis 안을 편하게 확인했습니다.
Product 등록

Product 변경

Product 삭제
마무리
이번에는 Write Through 전략을 구현해 데이터 변경 시 Redis에도 반영하는 작업을 해보았습니다.
하지만 이 방법은 아까 단점에서 언급했듯이 두 곳에 저장하기 때문에 지연 시간이 걸립니다.
그래서 높은 부하 상황에서는 성능 저하로 이어질 수 있습니다.
이 떄, Write Behind 전략을 성능을 높일 수 있습니다.
Write Behind 는 캐시에는 바로 적용하지만 DB에는 일정치를 모았다가 변경 사항을 한 번에 적용하는 방법입니다.
성능 향상에는 DB에 I/O를 줄이는 것이 중요합니다. Write Behind는 한 번에 모아서 보냄으로 DB I/O를 줄여 성능을 높이는 방법입니다.
다음에는 Write Behind 방법을 구현해보겠습니다.
감사합니다.